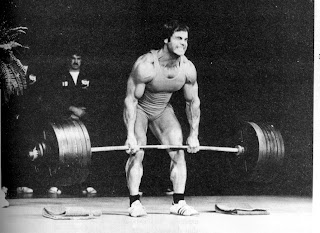
If I had to choose one weight room exercise to help boost the average triathlete's performance, reduce their risk of overuse injuries, and provide them with more strength and functionality in their everyday lives, I'd choose the deadlift.
By deadlifting, you increase ankle range of motion, increase strength and stiffness in the hamstrings and glutes, teach the posterior chain to fire simultaneously, get a great co-contraction of the muscles of the core, strengthen the scapulae, among other benefits. Despite what those proponents of bosu balls, pink weights, and smith machines might tell you, there's no better (and safer!) way to improve power than picking up the heaviest barbell you can.
Plus, it just makes you feel like a boss to stand there holding 400+ pounds in your hands while everyone else at you gym runs for cover, stares in awe, and shields their children's eyes.
That being said, not many inexperienced lifters possess the proper hip strength and mobility, core strength, or skill to properly execute this lift. Even though the deadlift is a great exercise when properly executed, it can be dangerous when it's poorly done.
 Deadlifts aren't inherently bad. But, badly done deadlifts (as shown above) can hurt.
Enter the one-legged RDL.
I like this exercise for so many reasons. I like that it teaches you to "hip-hinge", to bend at the hips as opposed to rounded the lower back. I like that it improves one-leg strength and strength/balance at the hips. I like the it works the glutes and hamstrings, muscles that are sometimes relatively underdeveloped in triathletes.
Tony Gentilcore just throw up a great article on the one-legged RDL over at his blog (which you can find here), so most of what I say from here on out will mostly just be me rewording his ideas.
You know what, I'm not even gonna reword it, I'll just repost his video and coaching cues below...
Again the video and italicized text below are not mine, but reposted from Tony's website. He's a great blogger, check him out here!
1. Keep the neck packed. Many will view this as looking down, but in fact, you're just keeping the neck in a neutral position. Ideally, when performing this exercise, you want to think of your entire backside as making a straight line (said differently, arch your back) from your head all the way down to your toes. Resultantly, you can think of it as making your spine long.
Now, admittedly, I did bend my moving leg slightly - but, for the most part, you should get the general idea.
2. CRUSH the dumbbell with your grip. By doing so, you create a phenomenon called irradiation, which forces the rotator cuff to fire and essentially "packs" the shoulder nice and tight. This is important because you can't think of this movement as actively lowering the DB with your arm - many trainees make the mistake of trying to touch the DB all the way to the floor, resulting in a significant amount of flexion, which I don't agree with.
Instead, a better way to approach it is to think about pushing your hips back (again, keeping your back in a straight line throughout). So, instead of actively thinking about lowering the DB, all you need to do is think "hips back," until the DB reaches roughly mid-shin level. At that point, you shoulde feel some pretty significant tension in the hamstrings.
3. Also of note, with the standing (supporting) leg, I like to tell trainees to keep a "soft knee." It shouldn't be locked or stiff. Ideally, you want about 15-20 degrees of knee flexion.
4. Again, pigging back on the points above, grip the DB HARD, push your hips back, and think about driving your moving leg's heel up towards the ceiling. Like I noted, you want to try to keep your backside as straight as possible, and I've found that using the "heel towards the celing" cue works wonders in that regard.
Likewise, as you push back, you should feel the brunt of your weight shift back into your supporting leg's heel. if you feel your weight shifting more towards your toes, try taking your shoes off as the additional heel lift will shift your weight anteriorly (which you don't want).
5. To finish, try to "pull" yourself back through the heel and squeeze your glute to finish. Repeat. Don't tip over. Be awesome.
6. Lastly, I'll just add that it's perfectly okay to perform this exercise in your "usable" range of motion. In other words, if you're unable to do it using a full ROM, there's no rule stating that you can't shorten the distance. Again, this is a very valuable exercise, and there are a lot of things coming into play here. So, if you have to limit the ROM due to poor hip stablity (for instance), that's fine. As you grow more proficient, you'll undoubtedly be able to increase your ROM as you go.


0 comments
Post a Comment